History buffs and strategy game veterans often find themselves fascinated by real-world military campaigns, they’re the original strategy games, complete with territorial control, resource management, and devastating consequence. The Chickamauga battlefield represents one of the most pivotal and brutal engagements of the American Civil War, and it’s a masterclass in tactical complexity that’ll sharpen your understanding of positioning, adaptation, and timing in both historical context and modern gaming. For gamers interested in RTS titles, turn-based tactics, or even historically-inspired shooters, studying how commanders maneuvered units across Chickamauga’s contested terrain offers practical lessons you can apply directly to your own gameplay. This guide walks through the Chickamauga Campaign’s strategic significance, the landscape that determined success and failure, the key commanders who shaped its outcome, and how visitors can explore this preserved battlefield today, plus concrete takeaways you can use to dominate your next strategy game session.
Table of Contents
ToggleKey Takeaways
- The Chickamauga battlefield, with 34,000 casualties over two days, remains one of the Civil War’s most significant battles and demonstrates how tactical positioning, terrain utilization, and communication failures determined victory and defeat.
- Chickamauga’s wooded, rolling terrain with elevated positions like Snodgrass Hill forced commanders to abandon traditional formations and adapt tactics—a principle that directly applies to strategy game map control and unit positioning.
- George Thomas’ defensive decision to hold Snodgrass Hill despite the Union collapse exemplifies how flexibility and adaptation can turn tactical setbacks into strategic advantages, a lesson critical for both historical study and RTS gameplay.
- The battle’s outcome hinged on a communication breakdown that created a gap in Union lines, reminding strategists that maintaining battlefield awareness and clear orders often matter more than raw military power.
- Visitors to the Chickamauga & Chattanooga National Military Park can explore over 8,000 preserved acres with 1,400+ markers, interpretive trails, and a museum that transforms historical study into hands-on tactical education.
Understanding The Chickamauga Campaign And Its Strategic Importance
The Battle’s Context In The American Civil War
The Battle of Chickamauga occurred on September 18–19, 1863, in northwest Georgia, and it stands as one of the bloodiest battles of the Civil War by casualty rate. The Union Army of the Cumberland, commanded by Major General William Rosecrans, clashed with Confederate General Braxton Bragg’s Army of Tennessee. At this point in the war, the Union was pressing south from Tennessee, aiming to capture Chattanooga, a critical railroad hub and supply route. Bragg positioned his forces defensively along Chickamauga Creek, betting he could repulse the Union advance and possibly break the Northern offensive momentum entirely.
This wasn’t just another skirmish. Control of the region determined whether the Union could effectively push deeper into the Confederate heartland. The battle cost roughly 34,000 casualties combined, killed, wounded, captured, or missing, over just two days. To put that in perspective, that’s equivalent to wiping an entire city off the map. The sheer scale makes it the second-bloodiest two-day battle of the entire war, second only to Gettysburg.
Why Military Strategists Still Study This Conflict Today
Military academies and strategists continue to dissect Chickamauga because it illustrates critical lessons about terrain utilization, communication breakdown, and the consequences of poor battlefield awareness. The Union suffered a tactical defeat here, Rosecrans actually withdrew from the field even though holding defensive ground, yet the strategic situation remained complicated. Bragg’s incomplete victory meant he couldn’t capitalize decisively, and within weeks, Union reinforcements under General Ulysses S. Grant turned the tables at Chattanooga.
What makes Chickamauga endlessly relevant to strategy game players is the interplay between individual tactical decisions and larger campaign objectives. The battle wasn’t lost by inferior numbers or poor equipment: it was lost because commanders made critical errors in unit placement and failed to adapt when circumstances shifted. For anyone playing turn-based tactics or RTS games, that’s gold, it reminds you that perfect positioning, timing your unit movements, and maintaining flexibility when the enemy adapts often matter more than raw power.
The Geographic Layout And Terrain Features Of Chickamauga
Key Landmarks And Elevation Advantages
Chickamauga battlefield sprawls across roughly 9,000 acres of rolling terrain in Georgia, and every hill, creek bed, and ridge mattered to the commanders on the ground. The Chickamauga Creek itself runs north-south through the region, and controlling the crossing points was essential for maintaining supply lines and tactical flexibility. Snodgrass Hill emerged as the crucial high-ground position, whoever held this elevated terrain controlled sight lines across the entire field and could direct effective fire across Union and Confederate positions.
Other notable landmarks include the Alexander Bridge, which served as a contested supply route, and Lytle Hill, another elevated position that troops fought over repeatedly. The forest density around these areas was significant too, thick woods provided cover but also fragmented unit cohesion and made coordinated attacks exponentially harder. This is the kind of terrain that immediately reminds strategy game players of map design principles: chokepoints, elevated positions for defensive advantage, and limited sightlines that reward careful scouting.
How Terrain Shaped Battle Tactics And Unit Movements
The wooded, hilly terrain of Chickamauga forced commanders to abandon textbook linear formations. Units couldn’t maintain tight, disciplined lines when moving through dense forest, they fragmented into smaller groups that were harder to coordinate but easier to defend with superior positioning. Both armies adapted by using the terrain for entrenchment and defense rather than aggressive maneuver.
The elevation changes meant cavalry couldn’t execute the kind of sweeping flanking movements they might on open terrain. Artillery, normally devastating in the Civil War, became less effective when enemy forces dug into wooded hillsides. This is exactly the dynamic you see in strategy games when players adapt unit composition and tactics to match the map layout. Terrain transforms from backdrop into active gameplay mechanic. Bragg’s strategy heavily leveraged this, he knew defending elevated positions with infantry gave him maximum advantage against a more mobile but less entrenched opponent.
Major Troop Movements And The Flow Of Battle
Union And Confederate Positions On September 18-19, 1863
On the morning of September 18, Rosecrans held the northern and western sections of the battlefield, with his army arranged roughly north-south along the western bank of Chickamauga Creek. His three corps, commanded by Thomas, McCook, and Crittenden, were spread across positions near roads and creek crossings. Bragg’s Confederates occupied positions to the east and south, initially with numerical disadvantage (roughly 66,000 Union to 62,000 Confederate), but they held elevated terrain and interior lines, meaning they could shift reserves more quickly between threatened sectors.
Bragg’s plan was elegantly aggressive: strike the Union left flank hard, break it, and then roll up the rest of the army. To execute this, he divided his force into two wings, Leonidas Polk’s corps on the right, James Longstreet’s (recently arrived from Virginia) on the left. The first attacks came early on the 18th but were repulsed. Fighting continued through the afternoon with neither side gaining decisive advantage, and both armies dug in overnight.
Critical Moments That Turned The Tide
September 19 opened with renewed Confederate assaults, and the battle became a grinding series of attacks and counterattacks. The Union line held through most of the day, but late in the afternoon, a critical error shattered Federal cohesion. A confused order from Rosecrans’ headquarters created a gap in the Union center, a supposed reserve unit wasn’t actually positioned where command thought it was. When Longstreet’s attack hit that exact spot, Confederate forces poured through the breach.
The Union right collapsed. Rosecrans himself, certain the battle was lost, withdrew toward Chattanooga with much of his command. But here’s where the tactical complexity gets interesting: Major General George Thomas, commanding the Union left, recognized the danger and executed a fighting withdrawal to Snodgrass Hill. Thomas held that position with roughly 23,000 troops against repeated Confederate assaults, he later earned the nickname “The Rock of Chickamauga” for this defense. His decision to hold instead of routing saved the entire Union army from annihilation. The battle ended with Union withdrawal, but the Confederate victory was hollow because Thomas’ rearguard action prevented a catastrophic collapse. This moment directly parallels RTS scenarios where holding a defensive position long enough for reinforcements to arrive completely changes the outcome.
Notable Commanders And Their Strategic Decisions
General Braxton Bragg And Confederate Leadership
Braxton Bragg is one of the most debated figures in Civil War history. At Chickamauga, he executed a solid battle plan with aggressive tactics that came close to breaking the Union army. His coordination of multiple corps attacking at different times showed reasonable tactical sophistication. But, Bragg’s follow-up was legendarily poor, he failed to pursue Rosecrans aggressively or coordinate his victory into a strategic advantage. By hesitating and consolidating instead of pressing the attack, he allowed the Union time to reorganize.
Bragg’s larger weakness was command presence and decisiveness. Officers frequently complained about unclear orders and his tendency to blame subordinates for failures. At Chickamauga, Leonidas Polk and others questioned some of his tactical directives, and those disagreements cost coordination. For strategy game players, Bragg represents the archetype of a commander with decent tactical instincts but poor strategic vision and command cohesion, the kind of player who can win individual battles but doesn’t leverage those wins into campaign dominance.
General Rosecrans And Union Command Structure
William Rosecrans was aggressive and tactically capable, but his performance at Chickamauga was marred by the confusion that led to the breakthrough. He’d been moving aggressively toward Chattanooga, and he didn’t anticipate the scale and coordination of Bragg’s counteroffensive. Once the battle opened, Rosecrans struggled to adapt, his orders became increasingly frantic, and he lost situational awareness as the field became chaotic.
Rosecrans’ major blunder was the order that created the gap in the center. Whether born from confusion or miscommunication, it was catastrophic. But unlike Bragg, Rosecrans at least recognized defeat when it came and extracted most of his army. He then competently organized a defensive position at Chattanooga, where reinforcements under Grant eventually stabilized the situation. From a gaming perspective, Rosecrans embodies the aggressive player who wins through initiative but can crumble when the enemy adapts, the kind of player who needs to maintain better battlefield awareness to prevent being exploited by a disciplined opponent.
Visiting And Exploring Chickamauga Battlefield Today
Preserved Sites And Historical Monuments
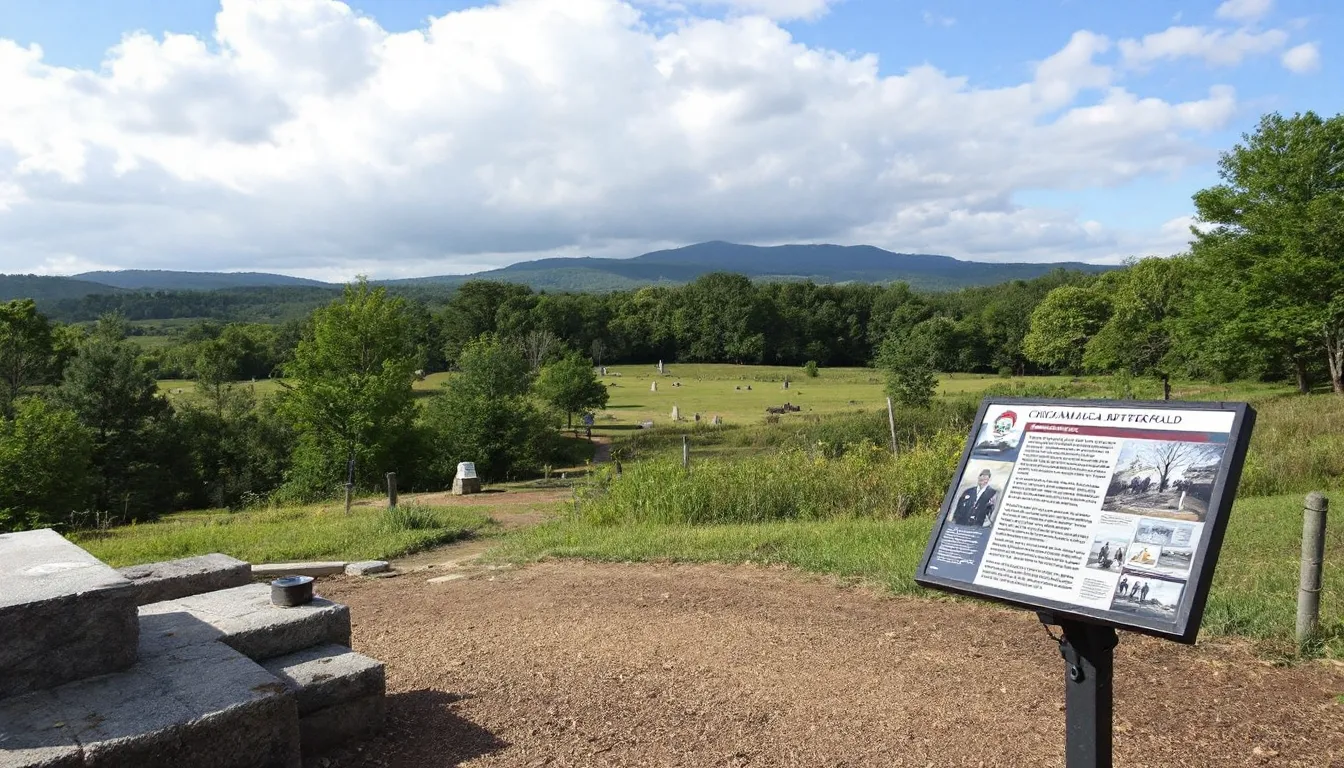
The Chickamauga & Chattanooga National Military Park preserves 8,000+ acres of the original battlefield, making it one of the largest and most well-maintained Civil War sites in America. The park maintains monuments for nearly every unit that fought there, with over 1,400 markers identifying positions and movements. Visitors can drive or walk the battlefield following clearly marked trails that follow the historical flow of the battle.
The Chickamauga battlefield visitor center sits at the park’s northern entrance and provides orientation, maps, and exhibits explaining the battle’s context and significance. From there, you can access preserved trenches, cannon positions, and reconstructed fortifications that show how troops actually dug in. Notable monuments include the New York State monument (one of the most impressive), several state markers (Kentucky, Tennessee, Ohio, etc.), and memorials to individual regiments that took heavy casualties.
Educational Resources And Interpretive Trails
The Chickamauga battlefield visitor center offers ranger-led programs, a museum with artifacts and documents, and educational materials for understanding the battle at whatever depth you prefer. The park maintains interpretive trails with wayside markers explaining what happened at each location. For deeper dives, there are detailed books and academic resources available, if you’re the type of player who reads historical strategy guides before jumping into a campaign, these resources reward that investment.
Multimedia presentations at the visitor center reconstruct the battle’s flow using maps and period accounts. They’re genuinely well-done and provide context that makes walking the actual terrain much more meaningful. Many visitors find that spending time at the Chickamauga battlefield visitor center before exploring the grounds transforms the experience from a simple historical visit into an active tactical study. The visual and spatial information you absorb directly translates to understanding how terrain constraints forced commanders into specific tactical approaches.
Applying Chickamauga Strategies To Modern Strategy Games
Lessons In Positioning, Timing, And Adaptation
Chickamauga teaches three core strategic principles that apply directly to any strategy game: first, terrain is a force multiplier. Defending elevated ground with infantry against attacking formations gives you exponential advantage. In RTS games, always analyze the map and identify high-ground positions before committing units, your control of these spaces will determine victory or defeat. Second, timing is everything. Bragg’s attacks on September 19 were coordinated to build momentum, but because attacks came sequentially rather than simultaneously, Union reserves could shift between threatened sectors. Simultaneous attacks from multiple directions, a lesson many RTS players learn the hard way, overwhelm defensive capacity.
Third, adaptation separates good players from great ones. George Thomas’ decision to hold Snodgrass Hill when the situation looked hopeless fundamentally changed the battle’s outcome. In your own games, that’s the equivalent of recognizing when a position is defensible and pivoting to defense rather than continuing an aggressive plan that’s clearly failing. Flexible players who adjust to enemy actions outperform rigid ones who execute predetermined strategies regardless of circumstances.
Real-World Tactics You Can Use In Battlefield And RTS Games
When playing team-based tactical shooters like Battlefield, apply Chickamauga’s terrain lessons directly. Snodgrass Hill’s defense worked because Thomas had interior lines, he could move reserves quickly between threatened areas without traveling as far as attackers had to advance. In Battlefield, this translates to controlling the center map positions where you can respond to threats on multiple fronts. Elevated positions with clear sightlines should always be prioritized over sprawling ground-level terrain.
For RTS games, competitive Battlefield loadouts and unit composition shifts emphasize adapting to enemy tactics. Just like how Bragg’s assault force composition changed when Longstreet arrived, you should adjust your army composition based on what your opponent is building. Heavy infantry? Add ranged units to soften them. Massed cavalry? Counter with defensive formations and entrenchments. The commanders at Chickamauga had limited information and had to gamble on tactics, but you have real-time visibility into enemy positions. Use that advantage to adapt faster than they can counter-adapt.
In turn-based tactics games, Chickamauga demonstrates why holding specific control points matters more than having the strongest individual units. Thomas’ defense on Snodgrass Hill involved coordinating rifle regiments and artillery into a cohesive position, it wasn’t about having the most elite troops, it was about optimal placement and mutual support. When building your squad or army in games like XCOM or Fire Emblem, always think about how units support each other and how positioning creates defensive networks. A mediocre unit in perfect position often outperforms an elite unit in isolation. Games that include RPG-style character progression and tactical positioning reward this kind of systems thinking.
Conclusion
The Chickamauga battlefield stands as a monument to the complexity of tactical warfare and the consequences of adaptation, or failure to adapt. For history enthusiasts, it’s a sobering reminder of the human cost of strategic miscalculation. For strategy game players, it’s a masterclass in terrain utilization, timing, communication, and the critical importance of flexible thinking when your initial plan encounters resistance.
Walking the Chickamauga battlefield with an understanding of what actually happened there, the terrain constraints that limited unit movement, the commands that fragmented due to miscommunication, the critical decision by Thomas to hold when retreat seemed logical, transforms a historical site into an interactive lesson in strategic thinking. Whether you’re planning your next RTS campaign, setting up defensive positions in a tactical shooter, or learning how to adapt when your carefully laid plans fall apart, Chickamauga’s lessons apply. The best strategy isn’t the one that works in ideal conditions, it’s the one that works when reality forces you to improvise.